2/28/19

Hair care tips and hair style

How to do hair care at home 

There is no hard and fast rule about shaping and styling of yours hair.it all boil down to the fundamental

Hair style
requirements: that the style must add charm to your face. But while selecting your hair style,there are few principales that ought to be adhered to. The style must match your face and highlight it's salient and attractive features. Hair designer are often asked questions about shape and their proportion to hair style keeping in mind the relationship to body height and styles you must strive to make your hair rather oval which is the ultimate in aesthetie.
                The general strategy is to add height and fullness to area to fall short . closeness is imparted when the arc is extended. This way a balanced look is achieved. In any case it is important to  increase or decrease the right amount of hair needed to create the proper hair face relationship.


ead also
 How to do manicure and pedicure at   home
     
 How to lose belly fat with natural   remedies

 Remember that your hair style must appear in the tendem with the body characteristics. Keep the mind that the normal proportion of head size to total hieghh measured at seven and half heads to height. What ever the fashion mode of the day, hair should reflected it's proper proportion relationship to the body. In this regard you must give due weightage to the density , texture and weight and colour of the hair and room for thier natural variation.
                Moreover the new generation of styling aids have revolutionized hair care and styling. Now we can infect life into our hair by building body,boost boo,shine  and fixing style in just a few minutes since the modern age is 'Instant Age' and you have very little time for everything. Everything has to be accomplished and accessories that are need to style your hair and give them the right look.

Mousse
Hair mousse

This is a fabulous, instant volume builder.it coast the hair making it easier to control and especially useful for taming freezy hair and for shaping the curl in permed hair .It will give energy to fine hair and extra texture to straight hair. Many mousses contain conditioners, which are excellent for dry ends.
  Apply mousse by squeezing a golfball-sized knob of foam in to the balm of your hand then apply it with your fingers to the roots. Mousse is the best applied to slightly damp hair because it will distribute better. Dont be tempted to use too much or you will overload the hair and be careful to use very little on fine hair or you could end up with a sticky, heavy result.
Experiment with different strength of mousse. It is often best to buy a mousse with a high hold factor and useless of it than to apply more of a lighter mousse.
     If you hair fell lank later in the day, spraying with a little water with revive it. shape your hair with your fingers as it dries.

Gels
Hair gel

Gel defines texture on curly hair and will sleek and hold strait hair in place. There are several ways to use it. Gelcan be applied to wet hair combedbed into shape and then left to set hard and you can blow-dry the gelled hair, which gives lots of body and bounce but still leaves it looking silky and natural. Gel spreads more easily when applied to wet or slightly damp hair.
       Gels formulated for use on dry hair are good for controlling small area of hair and for slicking it back at the side of your face if the brand you are using becomes flaky, switch to another formulation.
 You can combine product such as mousses and gels or moussesand hair spray for extra styling strength.

Styling lotions for blow drying

These spray in lotions protect hair om dry effects of heat when it is blow dried. They also help to keep the hair cuticle flat,which prevents flyaway ends and increase shine. Many formulation will also help to increase volume.

Sculpting lotion

These ultra strong hair shapers are designed to be applied either to damp hair which is then blow dried  into shape,or to dry hair for fullnrss or uplifting effects.

Hair spray
Hair spray

You can use hair spray for localized styling and to keep your hair sleek. Hair spray holds a polish Ed finished but allows movmenmo (which sculpting lotion do not ) if you simply want to control a few stray ends,spra sa little hairspray on to your brush and sweep it through your hair.
 Hairspray is indispensable when the atmosphere is humid because it prevent the dampness from making your hair limp.keep a mini hair spray in your bag- many pump sprays are refillable.

Pomade and wax
Hair wax and comb

There are useful for thick hair.but should  not be used  on fine hair apply a little,us usi your fingertips to separate and define the hair for instance.on a spiky fringe.pomade and wax are terrific for creating shine and controlling afro hair. Remember that they need to be washed out very thoroughly.

Serum

Fairly new in the market,serum are silicone based liquid that tame frizzy ends, flyaway hair and enhance shine on all hair types in seconds. you simply need a few drops, smoothed in the palm of your hands,the t applied where ever you want,  good ones don't feel sticky.

Twist plait and Rolls

As they say modern cllasicism is today way with hair looks. Hence there are multitude stylish way to dress mid-length and long hair.we choose accessories according to our needs. As mentioned earlier we should consider our hair in term of an overall look.
The beauty of mid-length and long hair is that it can be styled in an exciting variety of ways. Twist ,plaits,and braids rolls and chingnons all look super stylish and can be worn with simply accessories to secure them in place.or decorated ornately to create knock- out looks.
     The key to success when styling is to apply a little mousse or gel to control flyaway ends to sleek your hair before you start. you need to have a section of long hair pins. Kirby grips and covered elastics.

Twists

Quick to do, twist can be left soft and natural-looking there is no need to plaster on hair spray
  Simply twist your hair along the side of your head on one side and fasten it at the back the with shair clip
 Now twist back the other side and clip the two pieces together so that the hair hangs sleek and straight behind,or interweave the two twists at the nape of the neck and fasten with long hair pins
  Twist  look pretty when several tortoiseshell chingnon pins are placed around the twist
 Co mb can be used to help hold twist in place looks for combs without rough edges . Place them in your hair so that they grip by pushing the teeth up toward the crown of the head, then comb and push it down.

Plait ,Braid,Rooks,French pleat and chignons

Plait and Braids
Hair style

Ideally you need to have hair of one lenght to plait and braid it quickly. practice makes best plaits.
Braids (french plait ) are more tricky to do. Starting just below the crown of your head. devide the center of your hair into three sections plait  these together and then pick up another section on either side of the center piece and plait together again. continue down to the nape of your neck and then plait as usual, fastning with a slide or covered elastic at the end
 Sharp stylish and with a touch of formalities,rolls are fun to Wear with clothes that echo the style of the 1940s and 50s

 For a french pleat, take your hair back into the nape of the neck. twisting along the length of the hair. Roll the twist of hair upwards.turning the ends in,and fasten the pleat in place with pins.


These are good on fine to medium-textured hair but take a little more time on heaveih hair.

A low chignon placed at the nape of the neck looks modern. you can twist the hair and knot it, pulling the ends through the knot and securing with
pins. Alternatively you can take the hair into a low ponytail secure it with a covered elastic and then twist and pin into place.

Looks out for hanky knots. These are especially shaped piece of fabric (raw silk ones looks particularly good) which has have a elasticated piece at one end. simply place the fabric over the chignon and twist the elastic around twice to secure it.


/div>

2/25/19

Skin care naturally at home naturally

Through it might sound like a cliche-ridden phrase there is no other way you can express the fact that beauty is only skin deep. you may have large dreamy eyes, aquiline nose,cupid bow-luke formation of your eye brows and other parts of your body very well endowed but if you have rough , pimpled  and unglowing skin no one would look at you even once. For beauty is reflected through your skin .It is this covering your body that enchants the beholder and accentuates  the pulchritude of your other parts.
  Although you will rarely find two person having identical skin-no matter they be twins,yet broadly speaking,in general,human skin has been divided in the following categories

Skin care tips for all skin type

1.  Normal skin
2.  Greasy skin 
3. Dry skin 
4. Swallow skin
5.Combination skin
6.Sensitive skin
7.Chapped skin
8.Withered skin                                     

We shall be discussing each of them separately

Normal  skin 

A clear fine textured, supply and smooth surface which is  neither greasy nor dry are some of the characteristics of this type of skin. the possessor of this skin generally keeps good health which steams from smooth blood  circulation.Not requiring much of the Care even if normal body cleaning operations are performed twice a week this type of skin maintain its healthy glow. However, remember you should not use hard soap  but only miles baby soap,f fo hard soap with their  acidic contents tend to remove the normal shine of the skin earned by the natural and healthy flow of blood. At night,in order to keep your skin normal moisturizer balance , apply a thin film any home made moisture. In Case,due to vagaries of weather you feel your skin getting more oily or extra drying any area of your body, you may apply the lotion or remedies mentioned later for these varieties of skin. But remember to treat only the particular area and not the whole region.

Greasy or oily skin

Normally this variety of skin has coarse pores and pimples or other

Greasy  skin
embarrassing blemishes. In case you have such type of extremely
Oily skin,take a diet in proteins but restricted in sugar,fluids and salts. Also take plenty of leafy vegetable and fresh fruit.pork and fried and highly seasoned items of food should be avoided  have your blood up to par by suitable add miniadminis of necessary of vitamins,iron , mineral , similar substances . Besides taking internal care of yourself, you should also eqal care of externally. Half an hour before taking your bath apply on your face 1/2 tea spoon  each of lime and cucumber juice mixed together.if it is excessively oily, mix a few drops Eu-de- colonelganj. This not only help keep oilness away but helps in opening the pores of the skin by acting as astringent, thereby prevent acne. At times your make up  apear would be becoming patchy either on the  forehead,chin or more due to excessive oilness in these areas . The best remedy in such cases ,is applicaction of cold cucumber juice on the excessively oily part of your face

Swallow skin

This is a  typical skin with a distinct 'colourless look'.  It appears almost dead, lusterless and devoid of normal vital glow. Such person invariably
patient of anaemia with thier diet substantially lacking in vitamin 'B' and iron .This vitamin B, particularly 'B' is very good of curing you of pale ness because it keep the skin well nourished and rosy by keeping the blood circulation normal. Also active physical exercise will help you as it keep the blood circulation normal. Fresh blood and increased oxygen removed full and blemised look of the skin

Combination skin

Combination skin mean the type of skin that is both oily or greasy and dry in different part of the body normally people of this type skin have a greasy venter panel consisting of nose ,forehead and the chin. Why a dry panel consisting of cheeks , mouth and the area around the eyes? As mentioned in the skin categories of the relevant type , treat dry area with home made cold of  moisturising  cream while greasy patches with regular home made astringents some special home made creams and whiteness recipes are given ahead.

Senstive skin
A sensitive skin is a thin or fine textured skin that looks very delicate. It reacts quickly to both heat an d cold , it therefore gets sunburns and wind burns lotion and creams. Wash your face mild and baby soap, time

thoroughly and pat the skin dry wit h a soft towel, such people should never use any cream or lotion or perfumed/ cream etc.  and even synthetic clothes with our first  conducting their test on allergies of the material on the inside of yours wrist see the reaction of your skin to the substance.it is because not many items of make up agree with a sensitive skin. Also applying home made moisturising cream on your face before retiring for the night is a necessary  precaution for the persons with senstivse skin.


Chapped skin

Chapped skin

The rough texture of the skin .Which appears to be cracking some time falling this catagory. In case the cracks develop on your skin,then every day,at bed time,take the white of an egg,mix in one ground almond and briskly apply on your face. When the skin fells dry , wash off the paste with water and apply home made nourishing cream. Such person should avoid using soap totally because due to its acidic reaction soap dissolves the fat from the skin and takes them away from the surface. Instead,clean  your skin with gram flour made into paste with fresh milk cream. At least half an hour before you take your bath ma ,massage yourself either with  warm olive, mustard or coconut oil. Also after bathing rub yourself dry don't rub yourself vigorously wi th a bath towel. Every night before you retire,apply a home made cold cream. In case you cherish to maintain the youthful
Loveliness of a clean and flawless complexion,use cold or nourishing cream every night

Withered skin

This is a typical type of skin which has rough texture usually replete with wrinkles.it is due mainly to over exposure to extremes of climate as to much  heat or too much cold causes this state of skin. To protect yourself from falling a victim to such a skin always use sunscreen lotion or creams when ever you have to go outdoor for a good length of time soap being a taboo, always clean your face with milk cream .Soap tends to a the problems  of  this type of skin . Also do not forget to use moisturizing cream at night make the mixture the following way
Skin care tips for all skin type
and use it in the morning half an hour before taking bath. Take an eggs white an mix one  tablespoon of honey and one -fourth teaspoon of carrots juice . Let this mixture remain  on your skin about 20 to 30 minutes. Don't remove it rubbing off with hands but with a Cotton wool-soaked in warm water. This treatment surely remove roughness and wrinkles from the skin. Also , when you go to take your bath, add twI table spoon of Olive oil to the water in  the tub before the entering it. The ladies,with this type of skin ,shoul s use moisturizer laden make up base in all season. Also they must not ever prefer an ordinary skin but a lipstick with a creamy base. These external precautions will keep your even withered skin glowing naturally.


2/21/19

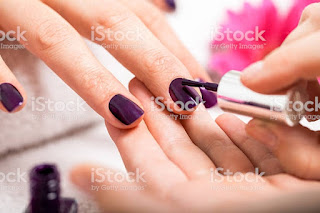
Manicure pedicure in hindi

       Manicure and pedicure  in hindi

आज मैं आपको मैनीक्योर और पैडीक्योर के बारे में बताने वाली  हूँ   आप जानते ही है कि मैनीक्योर क्या होता है लेकिन जो ये नहीं जानते  उनकी जानकारी के लिए बता दू कि मैनीक्योर का अर्थ है हाथों और नाखूनों की सफाई और देखभाल   हम अपने चेहरे की सुंदर रखने के लिए ब्लीच व मंहगे -मंहगे फैशियल करवाते हैं। लेकिन अपने हाथों और पैरो की ओर अधिक ध्यान नहीं देते हैं । जिसके कारण हाथों और पैरो की सुंदरता खो जाती है और वे भददे् दिखाई देने लगते है।  कामकाजी महिलाओं के पास तो इतना समय ही नहीं होता है कि वह ब्यूटी पार्लर  जाकर मैनीक्योर और पैडीक्योर करा सके लेकिन अपने पूरे दिन के समय में से  केवल आधा घंटा निकाल कर घर पर ही मैनीक्योर और पैडीक्योर कर  सकते है


मैनीक्योर व पैडीक्योर का सामान   

मैनीक्योर का सामान  -मैनीक्योर  सैट,सॉफ्ट प्यूमिक स्टोन, टॉवल, नेल ब्रश, छोटा बाउल, अमोनिया, हाईड्रोजन
Manicure ka saman

,स्पंज, मैनीक्योर शैम्पू , नेल पॉलिश , बेस कॉट,  टॉप कॉट , रिमूवर , कोल्ड क्रीम ,नमक ,डेटॉल 

मेनीक्योर

मेनीक्योर क्या होता है : मेनीक्योर हाथो को साफ सुथरा रखने की एक प्रक्रिया है जिस में हाथो के नाखूनों की देख भाल   कटे फटे हाथो की डेड स्किन निकाल कर हाथों को साफ किया जाता है manicure में हाथों की मसाज भी की जाती हैं कहने का मतलब है कि मेनीक्योर में हाथो की पूरी  देखभाल  या फिर पुरा treatment भी कह सकते है  मेनीक्योर हाथो को साफ सुथरा रखने और सुंदर रखने का बहुत सरल तरीका है 

मैनीक्योर करने की विधि

सबसे पहले हाथो की जवैलरी उतारें मैनीक्योर करने से पहले नेल्स ट्रीटमेंट करें  मैनीक्योर सैट (इसमें नाखूनों को शेप देने और साफ करने के instruement होते हैं) की मदद से नाखून साफ करें और अपने मनपसंद की शेप नाखूनों को दे  cutilce cuter की मदद से cutilces निकाले याद रखें कि नाखूनों को फाइल करते समय आगे पीछे न करें  नेल्स को म्योनिटी नहीं करना चाहिए  सबसे पहले गुनगुना पानी ले पानी  इसमेँ एक ढक्कन अमोनिया और एक ढक्कन हाइड्रोजन और शैंपू डालकर  घोल ले इस मे 5-7  मिनट तक हाथो को डुबोकर रखें और फिर स्पंज से हाथो को रगड़ते हुए साफ करें और प्यूमिक स्टोन की मदद से हाथो को हल्के हाथ से रगडते हुए  dead skin निकाले सॉफ्ट ब्रश से  का इस्तेमाल करते हुए नाखूनों व हाथो को अच्छी तरह से साफ करें और फिर साफ पानी से हाथ धो लें  तौलिये से  


हाथो को सुखाने के बाद किसी अच्छी मसाज क्रीम से हाथो की मसाज करें और फिर तौलिये की सहायता से हाथो को स्टीम दे  स्टीम दो बार भी दे सकते हैं  और  नेल पॉलिश लगाएं पहले बेस कॉट फिर टॉप कॉट 

इस तरह आप घर पर ही मैनीक्योर करके अपने हाथो को सुंदर रख सकते है और अपना पैसा और समय भी बचा सकते हो

पैडीक्योर Pedicure

पैडिक्योर का अर्थ है।  पैरो और  पैरों के नाखूनों की देखभाल  पैडिक्योर एक उपचार भी है  पैडिक्योर पैरों की थकावट दूर करने का बहुत आसान तरीका हैं जो कि हम घर पर ही आसानी से कर सकते हैं। पैडिक्योर पैरो के लिए बहुत जरूरी है क्योंकि शरीर का सारा भार पैरो पर ही पड़ता है।  इसलिए समय -2  पर इनकी देखभाल करना जरुरी है पैडिक्योर लेटिन भाषा का शब्द है पैडी का अर्थ है  नाखून और क्योर का अर्थ है। देखभाल  पैरो का treatment न केवल सुंदरता के बल्कि स्वास्थ्य के नजरिए से भी बहुत जरूरी है। शरीर का सारा भार पड़ने से पैरो मे सूजन  आ जाती हैं  इसलिए hot foot bath लेना चाहिए

पैडिक्योर करने की विधि

Pedicure

एक टब मे गर्म पानी ले पानी इतना गर्म हो जितना आप सहन कर सके और पानी में मैनिक्योर घोल की तरह ही  पैडिक्योर शैंपू  हाइड्रोजन पैराऑक्साइड , अमोनिया, सोडियम कार्बोनेट नमक डाले और दस मिनट तक पैरो को पानी में डुबाएं और काे पैरो स्पंज से हल्के  हाथ से रगड़े प्यूमिक स्टोन का भी हल्के हाथों से उपयोग करते हुए dead skin निकाले foot craper उपयोग एड़ियों पर हल्के हाथों से करें  नेल्स ब्रश से नेल्स साफ करे   पैडिक्योर हो जाने पर साफ पानी से पैर धो ले और थपथपा कर तौलिए से पैर साफ करे और तौलिये की सहायता से पैरो को स्टीम दे और अच्छी तरह से मसाज करें  मसाज कोल्ड क्रीम की जगह  किसी अच्छे तेल से भी की जा सकती है  फिर नेल्स treatment  करे क्यूटिकल्स काटे और नेल्स पर पहले बेस कोट फिर टॉप कॉट लगाएं


सावधानियां

-  मैनिक्योर करने से पहले ये देख ले कि हाथो पर     किसी  प्रकार की कोई एलर्जी तो नहीं है।

-नाखूनों को फाइल करते समय यह ध्यान में रखना चाहिए कि शेपर का प्रयोग किनारो पर अधिक न हो 


-क्यूटिकल्स कटर का प्रयोग करते समय क्यूटिकल पुशर  का  दबाव अधिक न डाले

इस तरह आप घर  पर ही मैनिक्योर और पैडिक्योर आसानी से कर सकते है।
Pedicure

Note - अगर आप का कोई सवाल हो तो आप comment box मे पूछ सकते है


2/19/19

ब्लीच कैसे करें How to do bleech at home

ब्लीच कैसे करें : 

ब्लीच कैसे करें ,ब्लीच कितने प्रकार की होती हैं  ,ब्लीच से पहले क्या लगाएं  ,ब्लीच करने के बाद क्या लगाएं  ,सबसे अच्छा ब्लीच कौन सा है

आज मैं आपको घर पर रोज करने का तरीका बताने वाली हूँ कि आप अपने घर पर ही आसानी से ब्लीच कैसे कर सकते हैं Bleech हमारे चेहरे को सुंदरता प्रदान करने की एक बहुत ही अच्छी तकनीक हैं थरेडिंग, वैक्सिंग, और ब्लीचिंग मे से त्वचा को सुंदरता प्रदान करने का bleechसबसे अच्छी तकनीक  है   इसे skin tone light होती है और dead skinभी निकल जाती है ब्लीच मे उन अनचाहे बालों को रंगा जाता हैं जो चेहरे और शरीर पर होते है उन्हें ब्लीच से हल्के भूरे या सुनहरे रंग में बदल दिया जाता हैं जिससे त्वचा का रंग साफ दिखाई देता है सवाल ये उठता है कि सबसे अच्छा ब्लीच कौन सा है।  फेम ब्लीच और एस्थाबेरी ब्लीच 

को  ही मैं recommend करती हूं अगर आपकी skin sensitive हैं तो आप fruit bleech use कर सकते हैं

 ब्लीच  करने की विधि

Bleech kaise kre

सबसे पहले ज्वैलरी उतारे  हैड बैंड लगाएं कपडों को टावल  से  cover करें चेहरे के अनुसार क्रीम ले और चेहरे की रंगत के अनुसार अमोनिया ग्रेंस डाले  चेहरे का रंग गोरा हो तो ग्रेंस की मात्रा दो चुटकी होनी चाहिए वैसे एक चुटकी डाले  पेस्ट हमेशा कांच या प्लास्टिक के बाउल में ही बनाना चाहिए पेस्ट को ब्रश की सहायता से अच्छी तरहसे मैल्ट कर लेना चाहिए और चैक कर लेना चाहिए कि ग्रेंस तो नहींं रह गए अगर ग्रेंस रह जाते है तो चेहरे पर  पिम्पल निकलने की संभावना होती जाती हैं इसी लिये ग्रेंस को अच्छी तरह से मैल्ट कर लेना चाहिए

चेहरे पर ब्लीच लगाने से पहले आईब्रो और हेयर लाइन पर वैसलीन या कोल्ड क्रीम लगा लेनी चाहिए ताकि आइब्रो के बाल ब्लीच न हो ब्रश की सहायता से चेहरे पर ब्लीच लगाएं  ब्लीच आईब्रो और आंखों के पास न लगाएं अगर गल्ती से लग जाए तो तुरंत साफ कर लेनी चाहिए ब्लीच का बुरा असर आंखों पर न पड़े इस लिए गुलाब जल के आईपैड आंखों पर लगा देने चाहिए 10-15 मिनट के बाद चैक करना चाहिए कि ब्लीच को गीले स्पंज की सहायता से सावधानी से उतारना चाहिए 


ब्लीच करने के बाद क्या लगाएं ?

ब्लीच उतारने के बाद सिरम से दो मिनट तक मसाज करनी चाहिए  अगर चेहरे पर जलन व सूजन हो जाए तो (lacto calamine lotion ) लगाएं अगर जलन  अधिक हो जाए तो एक avil tabet  ले


Lacto calamine use it after face bleech


Cream bleech market me available hoti h ap apni pasand se kisi bhi company ki bleech use kr sakte h. Main fem and oxy bleech ko recommend krungi agar skin sensitive  hai to fruit bleech use kre or activator ki matra kam rakhe


ब्लीच कब करनी चाहिए 

ब्लीच कब करनी चाहिए ये सवाल अक्सर लोग मुझसे पूछते हैं  ब्लीच कम से कम पंद्रह दिन के अंतराल से ही करनी चाहिए क्योंकि पंद्रह दिन तक ब्लीच चल जाती है

ब्लीच करने की साम्रगी

हैडबैंड,ice cube,या ठंडा पानी, प्लास्टिक या कांच का बाउल,कल्जिंंग मिल्क, कॉटन ब्लीच पावडर, अमोनिया, हाईड्रोजन, ब्लीचिंग ब्रश,टॉवल कोल्ड क्रीम
  

पावडर ब्लीच अधिकतर हाथ पैरों को ब्लीच करने के लिए उपयोग की जाती           एक प्लास्टिक या कांच का बाउल ले 6 चम्मच ब्लीच पावडर डाले एक ढक्कन ( 5ml )अमोनिया और दो ढक्कन(10ml )हाईड्रोजन डाल कर मैल्ट कर ले  जवैलरी उतारने के बाद इस पेस्ट को ब्रश की सहायता से हाथों और पैरो पर लगाएं या (जहाँ भी ब्लीच करना चाहते हो)
15-20मिनट बाद चैक करें ब्लीच हो जाने पर गीले स्पंज से साफ कर ले और ब्लीच उतारने के बाद मॉइस्चराइजर या कोल्ड क्रीम  जरुर लगाएं या बर्फ रगड़ ले इस से ब्लीच से होने वाली जलन व सूजन ठीक हो जाती हैं

सावधानिय़ाँ

  पैच टैस्ट ब्लीच का एक महत्वपूर्ण भाग हैं पहली बार ब्लीच करवा रहे हो तो पैच टैस्ट जरूर करना चाहिए पैच टैस्ट knap area  या कानो के पीछे करना चाहिए 5-7 मिनट बाद चैक करना चाहिए कि कोई जलन या सूजन तो नहीं है अगर जलन और सूजन अधिक हो तो ब्लीच नहीं करनी चाहिएअगर चेहरे पर pimples,agzimacut हो तो ब्लीच नहीं करनी चाहिए
- पहली बार ब्लीच कर रहे हो तो पहले पैच टैस्ट जरुर कर लेना चाहिए
-ब्लीच करते समय आंखों पर आईपैड जरुर रखें
-ब्लीकरने के बाद ice cube या cold cream से मसाज करनी चाहिए

Cold cream


 Read also

 Benefits and reviews of bio bloom face oil 


Jhaiya hatane ke upay         


2/15/19

मुंहासे हटाने के घरेलू उपाय


मुहासें निकलना एक आम समस्या है इस उम्र में शारिरिक परिवर्तन होने की वजह से तैलीय ग्रंथिया अधिक सक्रिय हो जाती हैं जिससे मुहासों की समस्या 
 
पैदा हो जाती हैं इसके अलावा ऑयली खाना खाने से, अनियमित खान-पान,कुपोषण, देर रात तक जागना, चाय कॉफी अधिक पीना, धूम्रपान करने से, कब्ज की शिकायत, मासिक धर्म सम्बन्धित गड़बड़ी बालों में रुसी, मानसिक तनाव आदि कारणों से चेहरे पर मुहासें पैदा हो जाते हैं लेकिन कुछ घरेलू उपायो से मुहासों से छुटकारा पाया जा सकता हैं


घरेलू उपाय

  1. खरबूजे के बीज को गाय के दूध में पीस कर चेहरे पर उबटन की तरह चेहरे पर लगाने से मुहासें दूर हो जाते है
  2.  कलौंजी को सिरके मे पीस लें रात को सोते समय चेहरे पर लगाएं सुबह ठंडे पानी से चेहरा धो लें ऐसा करने से मुहासें ठीक हो जाएंगे 
  3. नीम के बीज को पीस कर दही में मिला कर लगाने से भी मुहासें ठीक हो जातें हैं
  4. मुलहठी और बेर की गुठलियों को पानी में समान मात्रा में पीस लें इसे चेहरे पर उबटन की तरह लगाएं इस से भी मुहासें दूर हो जाते हैं
  5. केसर और लाल चंदन दोनों को पीस कर गुलाब जल मिला कर चेहरे पर लगाएं सूख जाने के बाद धो लें ऐसा करने से भी मुहासें जल्दी ही ठीक हो जाते हैं
  6. अजवाइन को पीस कर इस मे दही मिला कर चेहरे पर लगाएं 1 घंटे बाद ठंडे पानी से धो लें  इस से भी मुहासें ठीक हो जाते हैं 
  7. पुदीने की पतियों का पेस्ट  मुहासो  पर  लगाने से भी मुहासें सूख जाते ह
  8. जामुन की गुठलियों को छील कर पेस्ट बना ले और थोड़ा सा मटठा मिला कर लगाने से भी मुहासें ठीक हो जाते हैं 10-12 चिरौंजी के दानों को दूध में पीस कर पेस्ट बना ले और चेहरे पर लेप करें ऐसा करने से मुहासें तो ठीक होगें ही चेहरे पर निखार भी आ जाएगा
  9. 1लीटर पानी में एक चम्मच जीरा डाल कर उबाल लें ठंडा होने पर इस से चेहरा धो लें ऐसा रोज करने से  मुहासें ठीक हो जाएगें 
  10. आलू को कदूकस कर के 1/2 घंटे तक चेहरे पर लगाएं फिर ठंडे पानी से धो लें ऐसा करने से मुहासें दूर हो जाएगें और दाग धब्बे भी दूर हो जाएंगे 
  11. एक चम्मच शहद और एक चम्मच गुलाब जल दोनों को एक गिलास पानी में डाल कर  सुबह खाली पेट पीने से भी मुहासेंं ठीक हो जाता हैं 
  12. मुहासों की शिकायत कब्ज की वजह से हो तो एक गिलास गुनगुने  पानी में एक निंबू का रस मिला कर पिएं   नींबू मुहासों की  दवा  हैं  मतलब   नींबू  मुहासों  पर दवा की तरह  काम करता है    


  मुहासों बचाव के उपाय 

  • रोजाना चेहरे पर भाप ले भाप लेने से रोमकूप अच्छी तरह से खुल जाएंगे 
  •  उगते सूर्य की किरणे चेहरे पर लगने दे ऐसा करने से मुहासें निकलते ही नहीं है
  •  दिन मे 7-8 लीटर पानी पिएं इससे शरीर में नमी की कमी नहीं होगी 
  • चटपटे तलें ऑयली फूड न खाएं,
  • मुहासों को पिन,सूईं ,तीली आदि से न फोड़े                  

2/14/19

थर्मोहर्ब फेशियल क्या हैं thermo facial

Thermo herb facial and mask


धर्मोहरब क्या होता है what is thermo herb 
फेशियल के बारे मे आप जानते होंगे  ये एक फेशियल  होता है।ये झुर्रियां हटाने में सर्वोत्तम फैशियल माना जाता है हैं इस  फैशियल से चेहरे के कील मुहासें ,झुर्रियां साफ हो जाती हैं  ये थर्मोहरब  फेशियल 30 वर्ष से अधिक उम्र की   महिलाओ के लिये बहुत लाभकारी होता है । इससे चेहरे की ढीली त्वचा में कसाव आता है और झुर्रियां दूर हो जाती है    

थर्मोहरब फेशियल कैसे करें  (how to do thermo herbal facial at home)

थर्मोहरब फेशियल(thermo-herb facial) करने से पहले से चेहरे को  (deep cleansing)  साफ करें फिर विटामिन (ई) युक्त  cream  से फैशियल किया जाता हैं। 
फैशियल का समय 15-20 मिनट होता है।यदि त्वचा

अधिक रुखी हो तो  1/2 घंटे  मसाज दे सकते हैं इसमें skin toner का प्रयोग नहीं होता है।  इसके बाद भाप (steam) लेकर ब्लैक हैड निकालें और फिर थर्मोहर्ब मास्क लगाएं। 

थर्मोहरब मास्क लगाने की विधि- 
थर्मोहरबमास्क Thermo-herb mask: बहुत सावधानी से लगाना चाहिए 
मास्क लगाने से पहले चेहरे पर क्रीम की एक परत लगा दे ताकि चेहरे पर चिकनाई रहे
Thermoherb
 फिर चेहरे की हेयर लाइन पर रुई (cotton )लगा दें गॉज या पटटी पर आंखों व होंठों की कटिंग कर लें और चेहरे पर लगाएं  और फिर गॉज को  water spray की सहायता से हल्का गीला कर ले  बडे़ बाउल (bowl)मे थर्मोहर्ब डालकर  गुलाब जल के साथ अच्छी तरह मिला कर पेस्ट तैयार कर ले  और  चेहरे पर जल्दी -जल्दी लगाएं  याद रखें कि ये मास्क आंखों के नीचे,बालों और भौंहों(eyebrow) पर न लगाएं  गलती से लग जाए तो तुरंत हटा दें नहीं हटाया तो बाल काटने पड़ सकते हैं और इस पेस्ट को जल्दी-2 लगाएं नहीं तो ये पत्थर बन जाएगा इस मास्क को इतनी सफाई से लगाएं कि ये सूख कर टूटे नहीं 30-35मिनट बाद चेक कर ले कि  मास्क सूख गया है कि नहीं सूख जाने के बाद चारों ओर से स्किन खींच कर मास्क भली प्रकार से हटाएंं इसके बाद चेहरे को स्पंज से साफ कर लें और मॉइस्चराइजर लगाएं 
सावधानियां

  •   थर्मोहरब  मास्क पट्टी या गॉज के साथ ही लगाना चाहिए
  •   मास्क लगाते समय ये ध्यान रखें कि मास्क बालों पर न  लगें
  • थर्मोहरब मास्क लगे होने पर हिलना और बात नहीं करना चाहिए नहीं तो मास्क टूट जाएगा
  • धर्मो हरब मास्क एक महीने में में एक बार ही करना चाहिए

  • थर्मोहरब मास्क लगा कर बात नहीं करनी
Thermoherb mask

 चाहिए क्योंकि ऐसा करने से चेहरे पर झुर्रियां पड़ जाती हैं
  • धर्मो हर्बल फेस  मास्क बालों पर नहीं लगना चाहिए अगर बालों पर  लग जाए तो जल्दी से साफ कर लेना चाहिए नहीं  तो बाल काटने भी पड़ सकते हैं
  • जिन लोगों को सांस की तकलीफ  हो उन लोगों को  थर्मोहर्ब नहीं करना चाहिए
  • धर्मोहर्ब मास्क लगाते समय हेयर लाइन पर कॉटन का प्रयोग करने से मास्क आसानी से उतरता है।
 फेशियल करने के लाभ (Benefit of thermoherb facial)
Themoherb mask  का उपयोग चेहरे की ढीली पड़ी हुई त्वचा में कसाव लाने के लिए किया जाता है इसका इस्तेमाल 30 वर्ष से अधिक उम्र की महिलाओं को करना चाहिए  यह फेशियल चेहरे की झुर्रियां और दाग धब्बे हटाने में मदद करता है चेहरे पर चमक लाता है और (Thermo mask for face skin tightening )त्वचा में कसाव लाता है

Click here for original products

 Katori wax kaise kre 
 

2/11/19

belly fat loss tips


Lose belly fat simple and effective way

1.lemon water to lose belly fat

Get this- lemon
1 water(warm preferred)1glass

Do this:-  after you get up in the morning, take the lemon and squeeze out its juice in to the water for fat burning purpose.you can also use water at room temperature this won't stop lemon doing its job-mix well and drink this lemon water in empty stomach every day in the morning.

                          2.Drink cranberry juice to lose belly fat  cranberries are the rich source of organic acid like malic acid,citric acid quinic acid that function as digestive enzymes  these acid act emulsifying agent on stubborn fat deposits in your lymphatic system. which transport all waste products that your liver cannot proccess. Cranberries juice digest these lymphatic waste and help you reduce fat so drink 100 percent cranberry juice (unsweetened)or cran-water
Get this:- un sweetned cranberry juice
 8 oz or 1 cup water 
 56 Oz or 7 cup

Do this:- in the morning mix cranberry juice with Watertown get your days supply of warm water have one cup of this cran-water at a time through out the day you may have a cup each before breakfast and lunch, after  dinner and other times of a day. You may also make this  cran -water just before you have it. Just mix 2 tablespoon of cranberry juice to 7 oz (a little less than a cup plane water
3. Have a fish oil or fish to lose belly fat 
Fish oil omega 3 fatty acid in it omega 3 such as a leonic acid help in breaking down fat while reducing fat storage around your waist line.if you cannot take fish oil, have fish rich in omega 3 fatty acid
                                           

                        Do this: have 6g of fish oil daily. 6g roughly equal a generously filled table spoon which is on the verge of over following ulternatively you may have such fish as salmon on mackerel two time a week. Tuna and halibut are also high on omega 3
4. Have ginger tea to lose belly fat:   
you know that ginger is natural figesdige aid but did you know that thermogenic? thermogenic increase body temperature thus helping burn fat more effectively.
Do this: boil the water add ginger to the hot water and simmer for 5-10minutes. 
Remove from the stove and add lemon juice and honey 🍯 to this
Mix well and have a cup of ginger tea in the morning. To regulate your metabolism stimulat your digestion and reduce your cortisol production, value at last 2 cups of ginger tea through the day.
5. Hot pepper lose to belly fat
We hot pepper capsaicin which has thermogenic countain effects. it boosts your body's heat production and thus use more energy or coloric .it reduces abdominal fat and improve fat oxidation.so spices up your foods with hot pepper to lose belly fat.
Do this:  you can eat peeper row, cooked,dried or in powdered foum. it increase fat burning and lead to your belly fat loose. don't be shy to add as much cayenne or hot source as you can to your soups,egg e, gravies and meat.
6. Exercise to belly fat
a. Do whole body workout: loosing belly fat just by spot exercising stomach won't do. exercise your entire muscles group in whole body workout
b. Do cardiovascular exercise: walking , jogging, running, cycling , aerobics etc. increasing your body's capacity to burn more calories.
c. Do strength training: along with cardionwasla exercising, do strength training too.it will build your muscles tone to help you get rid of overall body fat.

All the best you in your efforts to lose belly fat.

Beauty products


More useful information

Chehre ke bal kaise hataye

   चेहरे पर उगने वाले बालों को हटाए आसानी से घर पर ही बिना दर्द केहमेशा के लए सामान :  दो चम्मच गेहूं का आटा, दो चम्मच बेसन, गुलाब जल, नारिय...